TL;DR
Moving your rig into a closet can significantly cut noise and reflections, but ventilation and treatment placement matter most. Properly managing heat and sound leaks makes a small space work wonders.
Ever wonder if your noisy AI workstation could be turned into a whisper-quiet hero? The trick isn’t just slapping foam on the walls. The secret lies in *where* you put it and how you handle heat. Acoustic Dampening, Placement, and the “Rig in the Closet” Setup Moving your rig into a closet might sound like a quick fix, but it’s a game-changer when done right.
This guide unpacks the real science behind sound dampening, the best placement strategies, and how to keep your hardware cool without turning your closet into a sauna. Whether you’re recording vocals or running a powerful inference rig, these tips make a difference.
Acoustic dampening
& the rig in the closet.
The most powerful noise fix isn’t a material — it’s a floor plan. A rig you can’t hear because it’s in another room beats any amount of foam. Tap the approaches in Part 1 to see what actually works.
(another room)
(levers 1–4)
(door / barrier)
(acoustic foam)
Contain the noise, not the heat
Key Takeaways
- Moving your rig into a closet can cut noise by 60% if ventilated properly.
- Acoustic dampening inside a small space reduces echo but doesn’t block sound leaks.
- Seal gaps around doors and vents to prevent sound from escaping.
- Proper placement of panels behind and around the mic makes a huge difference. Acoustic Dampening, Placement, and the "Rig in the Closet" Setup
- Ventilation is the biggest challenge—use ducted fans or passive vents to keep temps down.

Focusound 52 Pack Acoustic Foam Panels 1" x 12" x 12" Sound Proof Foam Panles Soundproofing Noise Cancelling Wedge Panels for Home Office Recoding Studio with 300PCS Double-Side Adhesive
Soundproofing - Acoustic foam panels triangular grooves structure for better noise absorption, helps to reduce and absorb unwanted...
As an affiliate, we earn on qualifying purchases.
As an affiliate, we earn on qualifying purchases.
What a closet rig can and can't do for your noise and sound
A closet rig mainly reduces reflections and airborne noise. It doesn’t block sound from escaping, unless you seal gaps or add mass. Think of it like putting a blanket over a speaker—inside sounds better, but the noise still leaks out.
For example, if you record in a closet with soft clothes and foam, your vocals sound warmer and less echoey. But if your goal is to silence the neighbors, sealing the door and adding mass is necessary.
Most people mistake a closet for a full soundproof booth. It’s really about controlling what’s inside and how it reflects, not total isolation.
Understanding these limits is crucial because it helps you set realistic expectations. Overestimating what a closet can do might lead you to invest in unnecessary treatments or overlook essential steps like sealing gaps or adding mass. The tradeoff is that while you can significantly improve internal acoustics and reduce echo, complete soundproofing requires more extensive measures and often professional intervention.
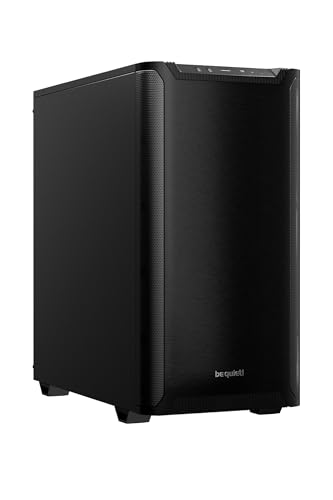
be quiet! Pure Base 501 Black ATX Case | 2 Preinstalled Pure Wings 3 140mm PWM Fans | Optimized Air Pressure | Compact PC Case | Vertical GPU Installation | USB 3.2 Gen. 2 Type C | BG073
Without any distractions, Pure Base 501 is reduced to excel at its core functions and is aimed at...
As an affiliate, we earn on qualifying purchases.
As an affiliate, we earn on qualifying purchases.
Acoustic dampening basics: what really makes a difference
Acoustic dampening reduces echo and harsh reflections inside a space. Foam panels and blankets absorb sound waves, preventing them from bouncing around. But they don’t stop sound from passing through walls or gaps.
Key areas to treat include the side walls, ceiling, and behind the mic—especially reflection points near your recording spot. For instance, hanging foam on the ceiling can tame the tinny sound bouncing from the top of your closet.
Remember: the goal is to soften the room’s echoes, not just slap foam everywhere. Sometimes, thick blankets or thick curtains work just as well. Effective dampening requires understanding how sound waves behave in your specific space. Absorbing the right frequencies at reflection points prevents comb-filtering and muddiness in recordings, leading to clearer audio. The tradeoff is that over-treating can deaden the sound too much, making it feel unnatural or overly dead. Finding the right balance ensures your recordings sound natural while minimizing disruptive reflections.

Easy Cloud Computer Fan with AC Plug, 120mm Variable Speed Axial Muffin PC Fan with Controller 120V 110V 220V Small 12V Case Cooling for PC Server Cabinet DVR TV Router Receiver Xbox Greenhouse
【Speed Controllable】Easy Cloud axial fan 120v allows you to freely adjust the computer cooling fan speed according to...
As an affiliate, we earn on qualifying purchases.
As an affiliate, we earn on qualifying purchases.
The best placement tips for your closet setup
Placement makes or breaks your sound quality. Here’s what works: home health tips
- Center your mic away from walls and reflective surfaces. Keep some space—at least a few inches.
- Use reflection points: treat the wall directly behind the mic and the first point where sound bounces from your mouth or instrument.
- Seal gaps around the door: weatherstripping or heavy curtains cut down on leaks.
- Soften the floor: add a rug or thick blanket to absorb reflections from below.
Proper placement is about controlling the direct sound path and minimizing early reflections that can muddy your recordings. For example, placing foam at ear level and behind the mic creates a more focused, professional sound. Acoustic Dampening, Placement, and the "Rig in the Closet" Setup Ignoring placement can lead to increased room noise pickup, muddier recordings, and a lack of clarity, which can be difficult to fix in post-production. The tradeoff here is that poor placement might require more extensive treatment later, increasing setup complexity and cost.

Weather Stripping Door Seal Strip - Soundproof Q-Shaped Foam for Exterior Door Frame, Large Gap Seal, Noise Cancelling, Easy to Install (Black, 26FT)
No light penetration: Our door seals are made of high-density foam core material, which effectively blocks light from...
As an affiliate, we earn on qualifying purchases.
As an affiliate, we earn on qualifying purchases.
How to ventilate and cool your closet rig without noise disaster
Ventilation is king. A sealed closet traps heat and can turn your quiet setup into a hot, throttling mess. The key is to create airflow that cools without noise.
Here are proven strategies:
- Install a quiet, ducted exhaust fan—think of it as a low-noise wind turbine.
- Use passive vents with high-quality filters to allow air exchange without letting noise escape.
- Place a small portable AIO cooler with ducting to pump heat outside the closet.
Proper ventilation prevents overheating, which can cause thermal throttling of your CPU and GPU, reducing performance and risking hardware failure. It also helps maintain a stable environment, which is vital for consistent performance and longevity. The tradeoff is that poor ventilation leads to overheating, increased noise from fans working harder, and potential hardware shutdowns. Achieving quiet airflow often involves balancing fan speed, duct design, and vent placement. For example, a 120mm fan running at low RPM can efficiently exhaust hot air without adding significant noise, but improper ducting can cause turbulence and noise leaks. Acoustic Dampening, Placement, and the "Rig in the Closet" Setup Consulting detailed cooling guides can help optimize this balance.
Sealing gaps, doors, and surfaces for maximum sound reduction
Small gaps in doors or cracks are the main sound leaks. Sealing them can drastically cut noise escape. Use weatherstripping, acoustic sealant, or heavy blankets over gaps.
In a closet, focus on:
- Door seals: foam strips or draft stoppers.
- Cracks around shelves or vents: sealant or acoustic caulk.
- Floor gaps: add a rug or foam under the door.
Sealing gaps not only reduces sound leaks but also prevents air drafts that can interfere with temperature regulation. Acoustic Dampening, Placement, and the "Rig in the Closet" Setup Proper sealing enhances overall soundproofing efficiency, allowing you to use less treatment and maintain a stable environment. The tradeoff is that improper sealing can trap heat or cause moisture buildup, so ventilation and moisture control should be considered alongside sealing efforts. For example, sealing a closet door with weatherstripping alone can cut noise transmission by 30-40%, but combining this with proper ventilation maximizes both soundproofing and thermal management.
Microphone and gear choices for small, treated spaces
In a closet, your mic choice can make a big difference. Condenser mics pick up more room reflections, so dynamic mics or those with tighter polar patterns often sound cleaner.
Using a shotgun mic or a mic with a built-in pop filter can reduce unwanted room noise. Also, a good shock mount minimizes vibrations transmitted through the stand.
For example, a Shure SM7B or a Rode PodMic tends to work well in tight spaces because they reject side noise and room reflections.
Choosing the right gear is about matching your environment’s limitations with equipment that minimizes pickup of unwanted sound. Using a microphone with a cardioid or hypercardioid pattern helps focus on your voice and reject off-axis noise, which is crucial in a small, reflective space. The tradeoff is that some mics might require additional preamps or audio processing, adding complexity and cost.
Common mistakes that kill your closet’s sound quality
Don’t just throw foam on the walls and call it a day. Over-treating can cause dead spots or uneven sound. Avoid sealing everything without ventilation. Never ignore gaps around doors or vents. Also, using cheap, thin blankets instead of proper acoustic treatment won’t cut it.
For example, a DIY closet booth with foam everywhere but no airflow overheats and sounds muffled, not professional. Over-treatment can also lead to a dead, unnatural sound that lacks liveliness, making recordings sound dull or sterile. On the other hand, neglecting ventilation or gaps results in noise leaks and overheating, which can damage equipment or degrade sound quality. The key is balance: treat reflection points, seal leaks, and ensure adequate airflow to maintain both sound quality and hardware health.
Your quick-start checklist for a perfect closet rig
- Place the mic at the reflection point and away from walls.
- Use absorption panels on the ceiling and behind the mic.
- Seal gaps around the door and vents.
- Install a quiet fan or duct system for airflow.
- Use a good mic suited for small spaces, like the SM7B.
Frequently Asked Questions
Is acoustic foam enough to soundproof my closet?
Acoustic foam mainly reduces echo and reflections inside your closet; it doesn’t block sound from escaping. For true soundproofing, sealing gaps and adding mass are necessary, but foam helps improve clarity inside.
Where should I put panels in my closet booth?
Place panels at reflection points—behind your mic, on the ceiling directly above, and on the side walls facing your voice. Use a mirror trick to find where sound bounces back to your mic.
How much treatment do I need for a small closet?
Start with panels behind the mic, on the ceiling, and at reflection points. Add bass traps if you notice low-end buildup. Don’t overdo it—balance is key.
Do I need bass traps in a closet?
If you notice low-frequency muddiness or booming, adding bass traps in corners can help. Otherwise, focus on mid and high-frequency absorption.
Will blankets work as well as acoustic panels?
Thick blankets can absorb some reflections, but they’re less effective and less durable than purpose-built panels. Use them as a temporary or supplemental solution.
Conclusion
Turning a closet into a quiet, professional-sounding workspace isn’t magic. It’s about smart placement, effective dampening, and managing heat. When you treat the space correctly, your AI rig or voice recordings will sound clearer and more polished, all without disturbing the rest of your home or office.
Remember: the goal isn’t just silence. It’s controlling reflections and leaks. A small, well-ventilated closet can be your secret weapon for focused work and pristine audio.