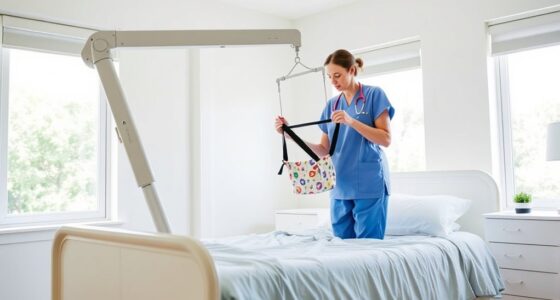

When installing grab bars and handrails, you need to identify high-risk areas like bathrooms and stairways, and measure the proper height—usually 33-36 inches from the floor. Use a stud finder to locate wall studs for secure support, and mark your positions carefully with a level. Choose sturdy materials and appropriate anchors for your wall type. Proper placement and secure fastening are key; continue with these tips to ensure safety and confidence in your installations.
Key Takeaways
- Locate wall studs or use suitable anchors to ensure grab bars support over 250 pounds safely.
- Measure and install grab bars 33-36 inches above the floor, extending at least 12 inches beyond doorway edges.
- Use a level and proper tools to ensure horizontal bars are aligned and securely fastened.
- Choose corrosion-resistant materials like stainless steel for durability in bathrooms and showers.
- Double-check wall surface type and support before drilling to prevent accidents and ensure safety.
Assessing High-Risk Areas for Safety
To make certain effective safety measures, you need to identify areas most prone to falls. Focus on spaces like bathrooms, stairways, hallways, and entryways, where accidents happen most often. Look for spots with uneven surfaces, slippery floors, or clutter that could cause someone to trip or slip. Check if these areas have enough space for grab bars and if they’re easily accessible. Consider lighting—poor lighting can hide hazards. Also, evaluate the height and placement of fixtures and furniture to ensure they don’t obstruct movement. Conducting a home safety assessment can further help identify potential risks and ensure comprehensive safety planning. Being aware of hazard-prone areas is essential for implementing targeted safety measures. Recognizing architectural solutions that support safety can enhance your safety plan significantly, especially those designed with barrier-free design principles in mind. Incorporating contrast and visibility enhancements can also improve safety by making hazards more noticeable and reducing accidents.
Selecting the Right Materials and Tools
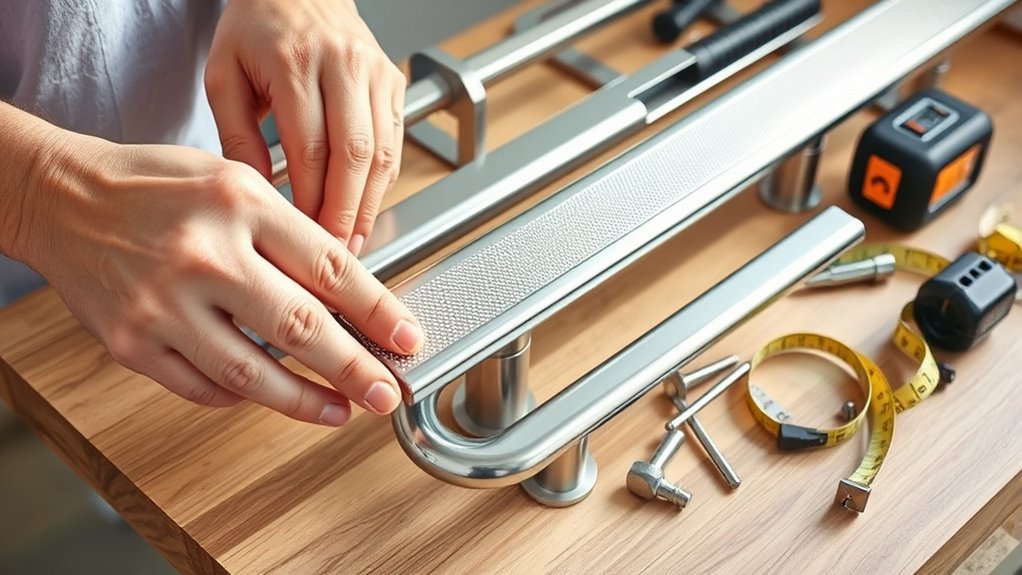
Choosing the right materials and tools is essential for a secure and durable grab bar installation. You’ll want sturdy, corrosion-resistant materials like stainless steel or high-quality plastic-coated metal for the bars, ensuring they can support weight and resist moisture. Select fasteners and anchors compatible with your wall surface—toggle bolts for drywall, masonry anchors for concrete, or screws for wood studs. Use a drill with appropriate bits, such as tile bits for ceramic surfaces, to prevent damage. A level ensures proper alignment, while a tape measure helps set correct heights. Keep a pencil for marking, and have a screwdriver or wrench on hand for tightening. Using the right tools and materials guarantees safety, stability, and long-lasting performance. Additionally, considering the piercing materials used for body jewelry can help prevent irritation or allergic reactions during cleaning and handling. Being aware of material compatibility can further enhance the durability and safety of your installation. Choosing appropriate fasteners can also improve the overall security of the grab bar over time. It’s also beneficial to verify the weight capacity of the chosen materials to ensure they meet safety requirements. To ensure your installation meets all safety standards, consulting professional guidelines can provide valuable insights and peace of mind.
Planning the Placement of Grab Bars and Handrails

Effective placement of grab bars and handrails begins with evaluating the specific needs of each space and user. Identify high-risk areas like bathrooms, stairways, and entryways, where falls are most common. Consider the user’s mobility, strength, and daily routines to determine suitable locations. Measure the ideal height, typically between 33 and 36 inches from the floor, for easy grip. Assess wall surface materials to choose appropriate mounting hardware. Confirm grab bars will provide continuous support along stairs or hallways and are positioned where users can comfortably reach and hold them without straining. Proper planning prevents unnecessary adjustments later, making installation smoother and guaranteeing safety and stability for the user. Incorporating simple strategies can further streamline the process and ensure consistent safety measures across your home. Additionally, utilizing smart home automation features can help monitor and support users’ safety needs more effectively.
Identifying Wall Studs and Other Support Structures

To securely install grab bars, you need to find wall studs accurately, as they provide the best support. If studs aren’t accessible, you can use alternative support options like toggle anchors or reinforced blocking. Ensuring proper support is key to safe, reliable installation. For optimal stability, understanding the field‑of‑view and how it relates to wall structures can help you better locate suitable mounting points.
Locating Studs Accurately
Locating wall studs accurately is essential for ensuring that grab bars and handrails are securely anchored. Use a stud finder to identify the edges of studs behind drywall or other surfaces. Move the device horizontally across the wall, marking the edges once detected, then measure to find the center for ideal support. If a stud finder isn’t available, look for clues like evenly spaced outlets, switches, or wood paneling, which typically align with studs. Tapping lightly on the wall can also reveal solid areas versus hollow spaces—solid sounds indicate studs. Always double-check your markings to confirm stud locations before drilling. Properly locating studs ensures your grab bars are anchored into strong support, providing maximum safety and stability. Additionally, understanding Free Floating principles can help in designing safer, more adaptable bathroom features that blend seamlessly with existing structures.
Alternative Support Options
When wall studs aren’t easily accessible or suitable for anchoring grab bars, exploring alternative support options becomes important. You can use toggle bolts or molly bolts, which expand behind drywall or other hollow walls to provide stability. For concrete or brick surfaces, masonry anchors or sleeve anchors offer secure attachment points. Reinforced wall blocking behind tiled or fiberglass surfaces provides a solid support base, especially when studs aren’t nearby. Consider installing grab bars into solid wood framing or using heavy-duty wall anchors rated for the required load. Always verify the support structure’s integrity before drilling, and follow manufacturer guidelines for proper installation. Understanding load capacities and the support structure’s strength is essential to ensure a safe and stable grab bar even when traditional wall studs aren’t accessible. Additionally, consulting professional installation services can help ensure the support system is secure and reliable.
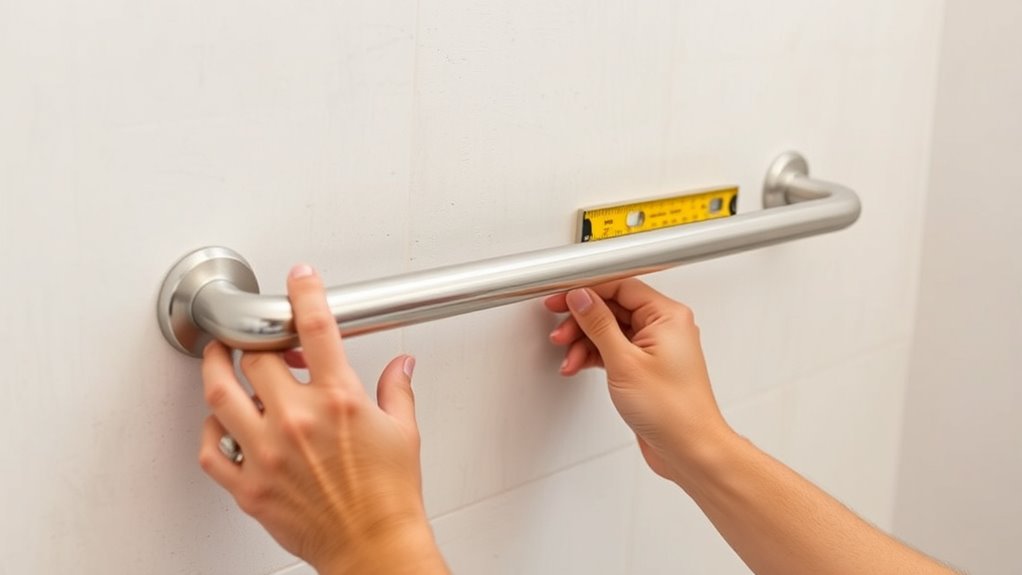
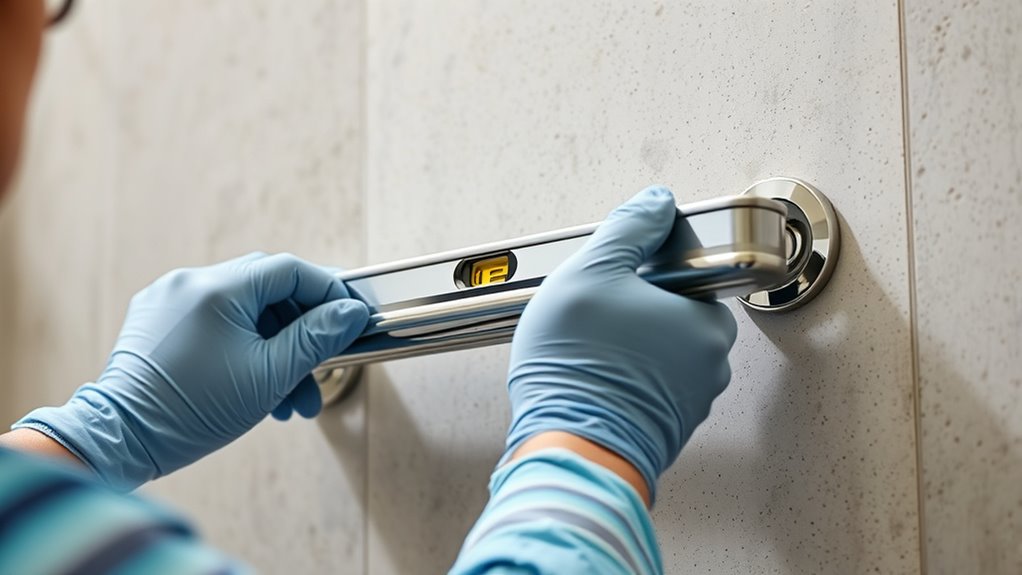
Measuring and Marking for Accurate Installation
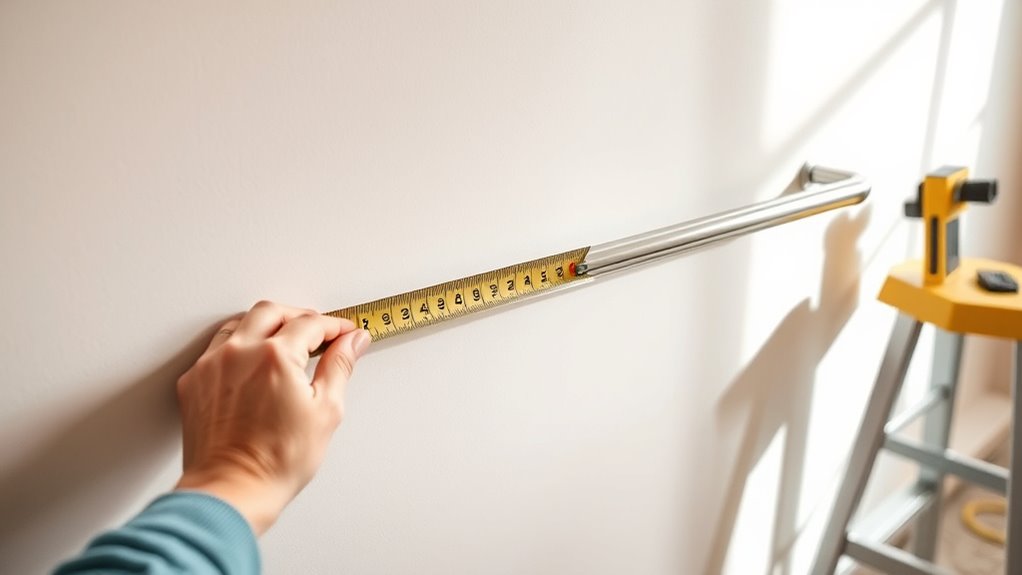
To make certain your grab bars are secure and effective, start by measuring the correct height, typically between 33 and 36 inches from the floor. Use a level and a pencil to mark precise positions on the wall, making sure they align with wall studs whenever possible. Accurate measurements and markings prevent installation issues and guarantee reliable support.
Precise Height Measurements
Achieving a secure and comfortable grip requires installing grab bars at the correct height, so precise measurement is essential. To verify accuracy, first measure the standard height of 33 to 36 inches from the floor, depending on user needs. Next, mark the exact points on the wall using a level to maintain horizontal alignment. Finally, double-check your measurements before drilling to prevent mistakes.
Here’s what to focus on:
- Confirm the height matches user preferences and reach capability.
- Use a measuring tape and level for consistent, horizontal markings.
- Mark the location clearly with a pencil, ensuring no shifts before installation.
Accurate height measurement guarantees proper support and user safety.
Accurate Position Marking
Accurate position marking is essential for ensuring grab bars are installed correctly and function safely. First, measure the height from the floor, aiming for 33 to 36 inches, and mark this line across the wall. Use a level to draw a straight, horizontal line at this height. Next, locate wall studs by tapping or using a stud finder, and mark their positions. If studs aren’t available, plan for toggle anchors. Mark the exact spots where the mounting brackets will go, ensuring they align with the studs or anchors. Double-check measurements for symmetry and proper placement, especially for bathroom fixtures like toilet and bathtub bars. Clear, precise markings ensure your grab bars will be secure, effective, and safe to use.
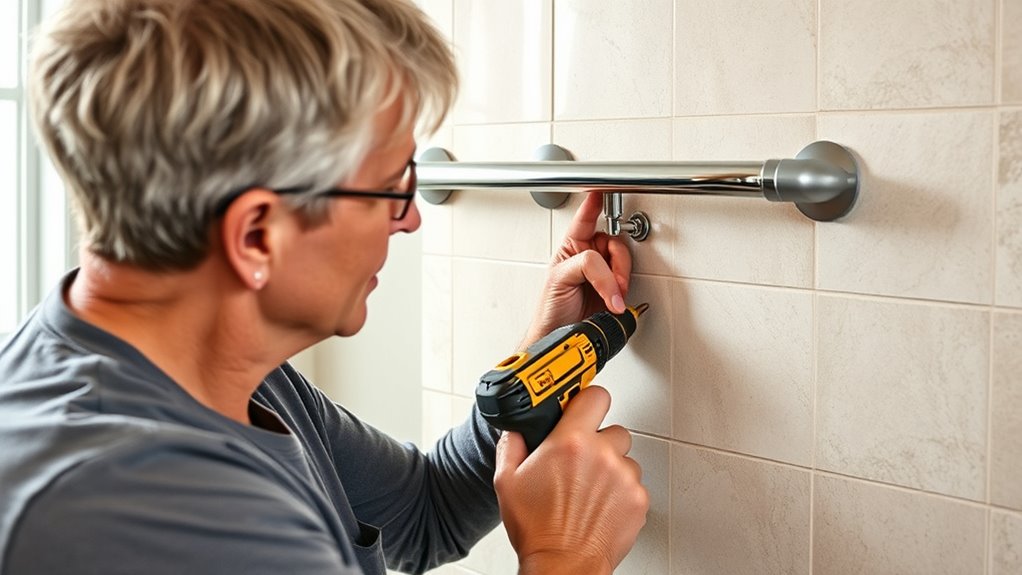
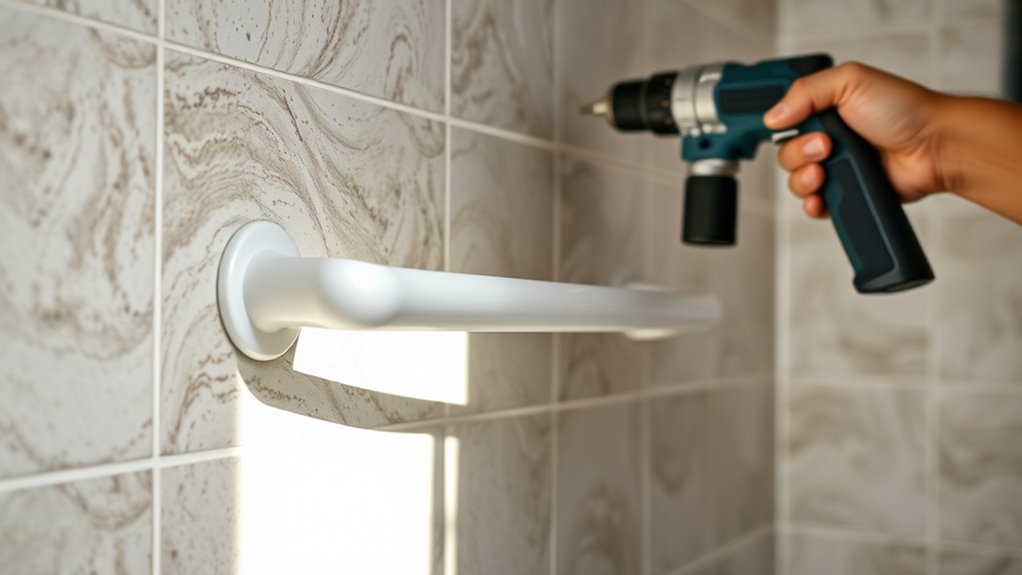
Drilling and Anchoring Techniques for Secure Mounting

When mounting grab bars, selecting the right drilling and anchoring techniques is essential for guaranteeing stability and safety. First, identify whether your wall has studs or if you need anchors. For stud-based mounting, drill directly into the center of the stud for maximum support. If studs aren’t accessible, use toggle bolts or wall anchors suited to your wall material. Second, always use the correct drill bit—masonry bits for tile and concrete, standard bits for drywall or wood. Third, tighten screws just enough to secure the bar without damaging the wall, avoiding overtightening which can cause cracks. Proper technique assures your grab bar stays firmly in place and supports weight safely, reducing fall risk and providing reliable assistance when needed. Additionally, understanding the importance of machine quality can help ensure your tools are effective when installing hardware, since reliable tools contribute to accurate and safe installation. Using appropriate tools also minimizes installation errors and enhances overall safety. Moreover, selecting the right anchors based on wall type can prevent future loosening or failure of the mounted grab bar. Ensuring that your tools are high-quality and well-maintained further guarantees precise work and long-term durability of your installation.
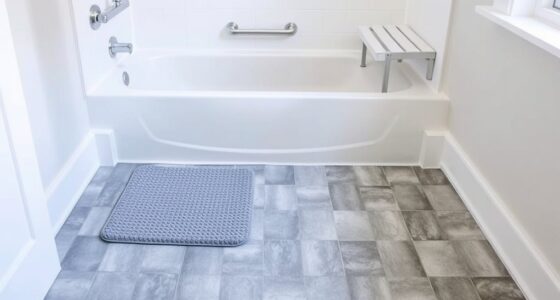
Installing Grab Bars in Bathrooms and Showers
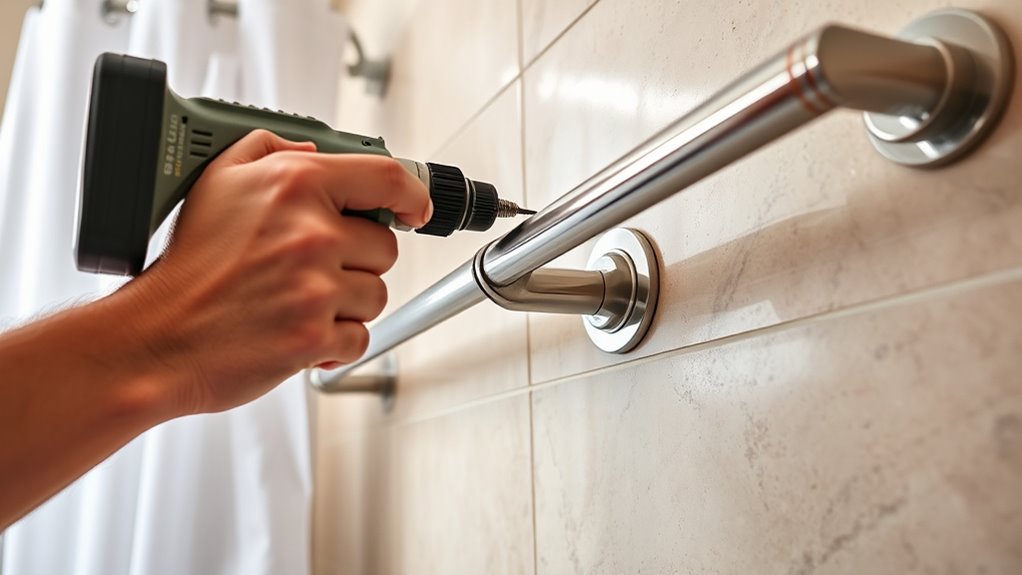
Are you prepared to guarantee safety and stability in your bathroom or shower? To install grab bars effectively, first identify wall studs using a stud finder, ensuring secure anchoring. Select bars that meet size and height standards—typically 36 inches long, positioned 33-36 inches from the floor. Use appropriate fasteners based on surface material, such as toggles for drywall or masonry anchors for tile. Proper placement involves installing two bars on the back wall (one 8-10 inches above the tub rim) and on side walls, following minimum length requirements. Ensure the bars are 1.5 inches from the wall for grip. Confirm load capacity exceeds 250 pounds, and tighten all fasteners securely for durability. For added safety and support focus, consider the thermal behavior of wall materials to prevent cracking or damage during installation. Additionally, verifying the wall material properties can help prevent damage and ensure secure installation over time. Being aware of installation techniques can also improve safety and longevity of the grab bars, especially when factoring in building codes and safety standards.
Attaching Support Bars for Doorways and Entryways
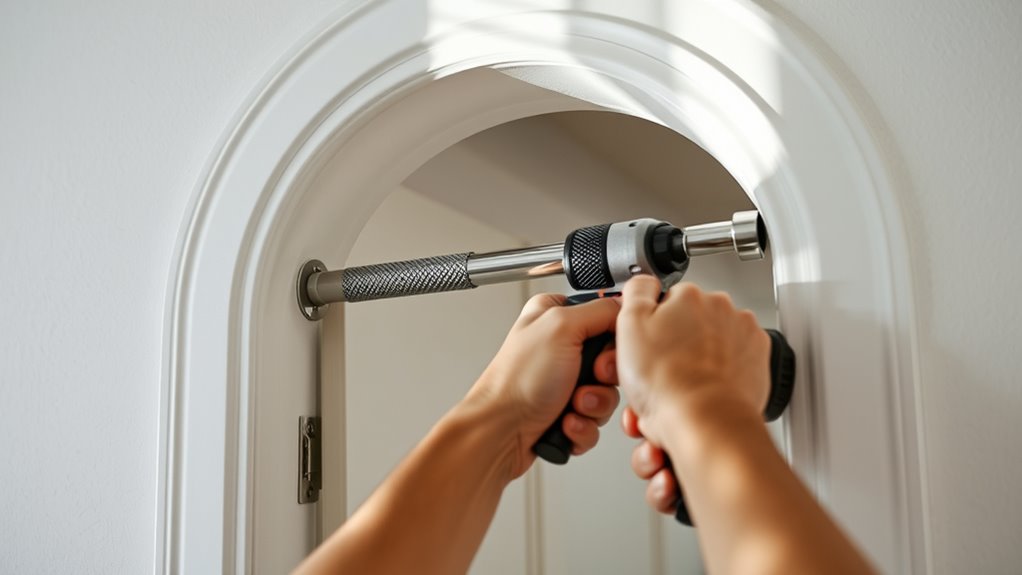
To guarantee support bars provide maximum safety, you need to focus on excellent placement strategies that align with user needs and door functionality. Secure mounting techniques are vital, so always use the right anchors and hardware for your wall type to prevent instability. Properly attaching support bars in doorways and entryways helps maintain balance and reduces fall risks effectively.
Optimal Placement Strategies
Have you considered the most effective placement of support bars to maximize safety and accessibility at doorways and entryways? Proper positioning guarantees users can maintain balance and support during transitions. First, install the bar 33 to 36 inches above the floor for optimal grip. Second, position it so that it extends at least 12 inches on each side of the doorway or threshold, providing continuous support. Third, ensure the bar is aligned parallel to the doorframe, avoiding interference with door operation or hardware. Confirm wall stud locations before mounting, as they offer the best anchoring points. Additionally, avoid placing support bars where they may obstruct door swings or hardware. Precise placement enhances safety without compromising functionality or ease of access.
Secure Mounting Techniques
Securing support bars effectively requires selecting the appropriate mounting methods based on wall surface and structural support. You should identify wall studs first, as they offer the strongest support. When studs aren’t available, toggle-bolt anchors or reinforced blocking provide reliable alternatives. Use manufacturer-recommended fasteners to guarantee stability and proper weight distribution. Tighten screws to finger-tight plus half a turn, preventing wall damage or rocking.
| Wall Surface | Best Mounting Method |
|---|---|
| Wall studs | Direct screw into studs |
| Drywall or paneling | Toggle-bolt anchors or reinforced blocking |
| Tile or stone | Tile drill bit with anchors |
| Concrete or brick | Masonry anchors and screws |
Ensuring Proper Height and Clearance Standards
Ensuring proper height and clearance standards is essential for safe and effective grab bar installation. You want the bars to be accessible without causing strain or obstruction. First, position horizontal grab bars between 33 and 36 inches from the floor to accommodate most users comfortably. Second, leave at least 12 inches of vertical space above and below the bar to allow for easy gripping and reach. Third, guarantee there’s a minimum of 1.5 inches of clearance between the grab bar and the wall surface, providing enough space for fingers to grasp securely. Proper measurements prevent awkward angles and improve safety. Double-check wall stud locations and surface types before installation to guarantee stability and compliance. These standards help maximize support and minimize fall risks.
Testing and Finalizing Your Grab Bar Installations
After completing the installation, it’s important to thoroughly test your grab bars to confirm they’re secure and functioning properly. Begin by applying gentle, steady pulls on each bar to check for movement or looseness. If you notice any wiggle or detachment, tighten the screws or anchors as needed. Ensure the grab bars can support at least 250 pounds, as per safety standards, by applying moderate force in different directions. Also, verify the grip surface remains smooth and free of sharp edges or cracks. Confirm the bars are level and positioned at the correct height. Finally, test the bars with the intended user in mind, ensuring they feel comfortable and secure during use. Proper testing guarantees safety and reliability before everyday use.
Frequently Asked Questions
How Do I Prevent Wall Damage During Installation?
To prevent wall damage during installation, you should use painter’s tape to mark drilling spots, which helps keep your drill bit steady. Apply equal pressure when tightening screws to avoid cracking drywall or tiles. Remove escutcheons before installing screws so you don’t impair the wall surface. Also, use appropriate drill bits, like tile bits for tiles, to prevent surface cracking. Taking these steps ensures a secure, damage-free installation.
What Safety Precautions Should I Take When Using Power Tools?
When using power tools, always wear safety gear like goggles and gloves to protect your eyes and hands. Keep your workspace clear of clutter to prevent accidents. Read the manufacturer’s instructions carefully before operating any tool. Use the right bit for the material you’re working on, and secure the item firmly to avoid slips. Turn off and unplug tools when adjusting or not in use to guarantee safety.
How Can I Verify the Load Capacity of My Grab Bars?
You can verify your grab bars’ load capacity by checking the manufacturer’s specifications, which should state the maximum weight they can support, usually at least 250 pounds. If the info isn’t clear, look for labels or markings on the bars. Additionally, guarantee the installation uses proper anchors and mounts directly into studs or reinforced wall areas for ideal support. Testing the bars by applying steady, firm pressure can also help confirm their strength before use.
Are There Specific Considerations for Installing Grab Bars on Tile Surfaces?
Installing grab bars on tile surfaces requires careful consideration. You should use a tile drill bit to prevent cracking and guarantee precise hole placement. Before drilling, apply painter’s tape to keep the drill bit steady. Anchoring must be secure; toggle bolts or wall anchors designed for tile provide stability. Tighten screws firmly but avoid overtightening, which can damage the tile. Proper installation ensures safety and durability for everyday use.
What Should I Do if I Can’t Find Wall Studs?
If you can’t find wall studs, don’t worry. You should use toggle-bolt anchors or other suitable wall anchors that can support the grab bar’s weight. Make sure to choose anchors rated for load capacity and compatible with your wall material. Drill carefully using the right bit, and tighten screws firmly but not too tight to avoid damaging the wall. Always test the grab bar for stability before use.
Conclusion
While installing grab bars might seem simple, neglecting proper safety tips can turn your efforts into a risky joke. You may think you’re safeguarding loved ones, but a shaky or wrongly placed bar could do more harm than good. So, take your time, follow these steps carefully, and remember: sometimes, the biggest safety upgrade starts with paying attention to the details others overlook. After all, safety isn’t just about installation—it’s about peace of mind.